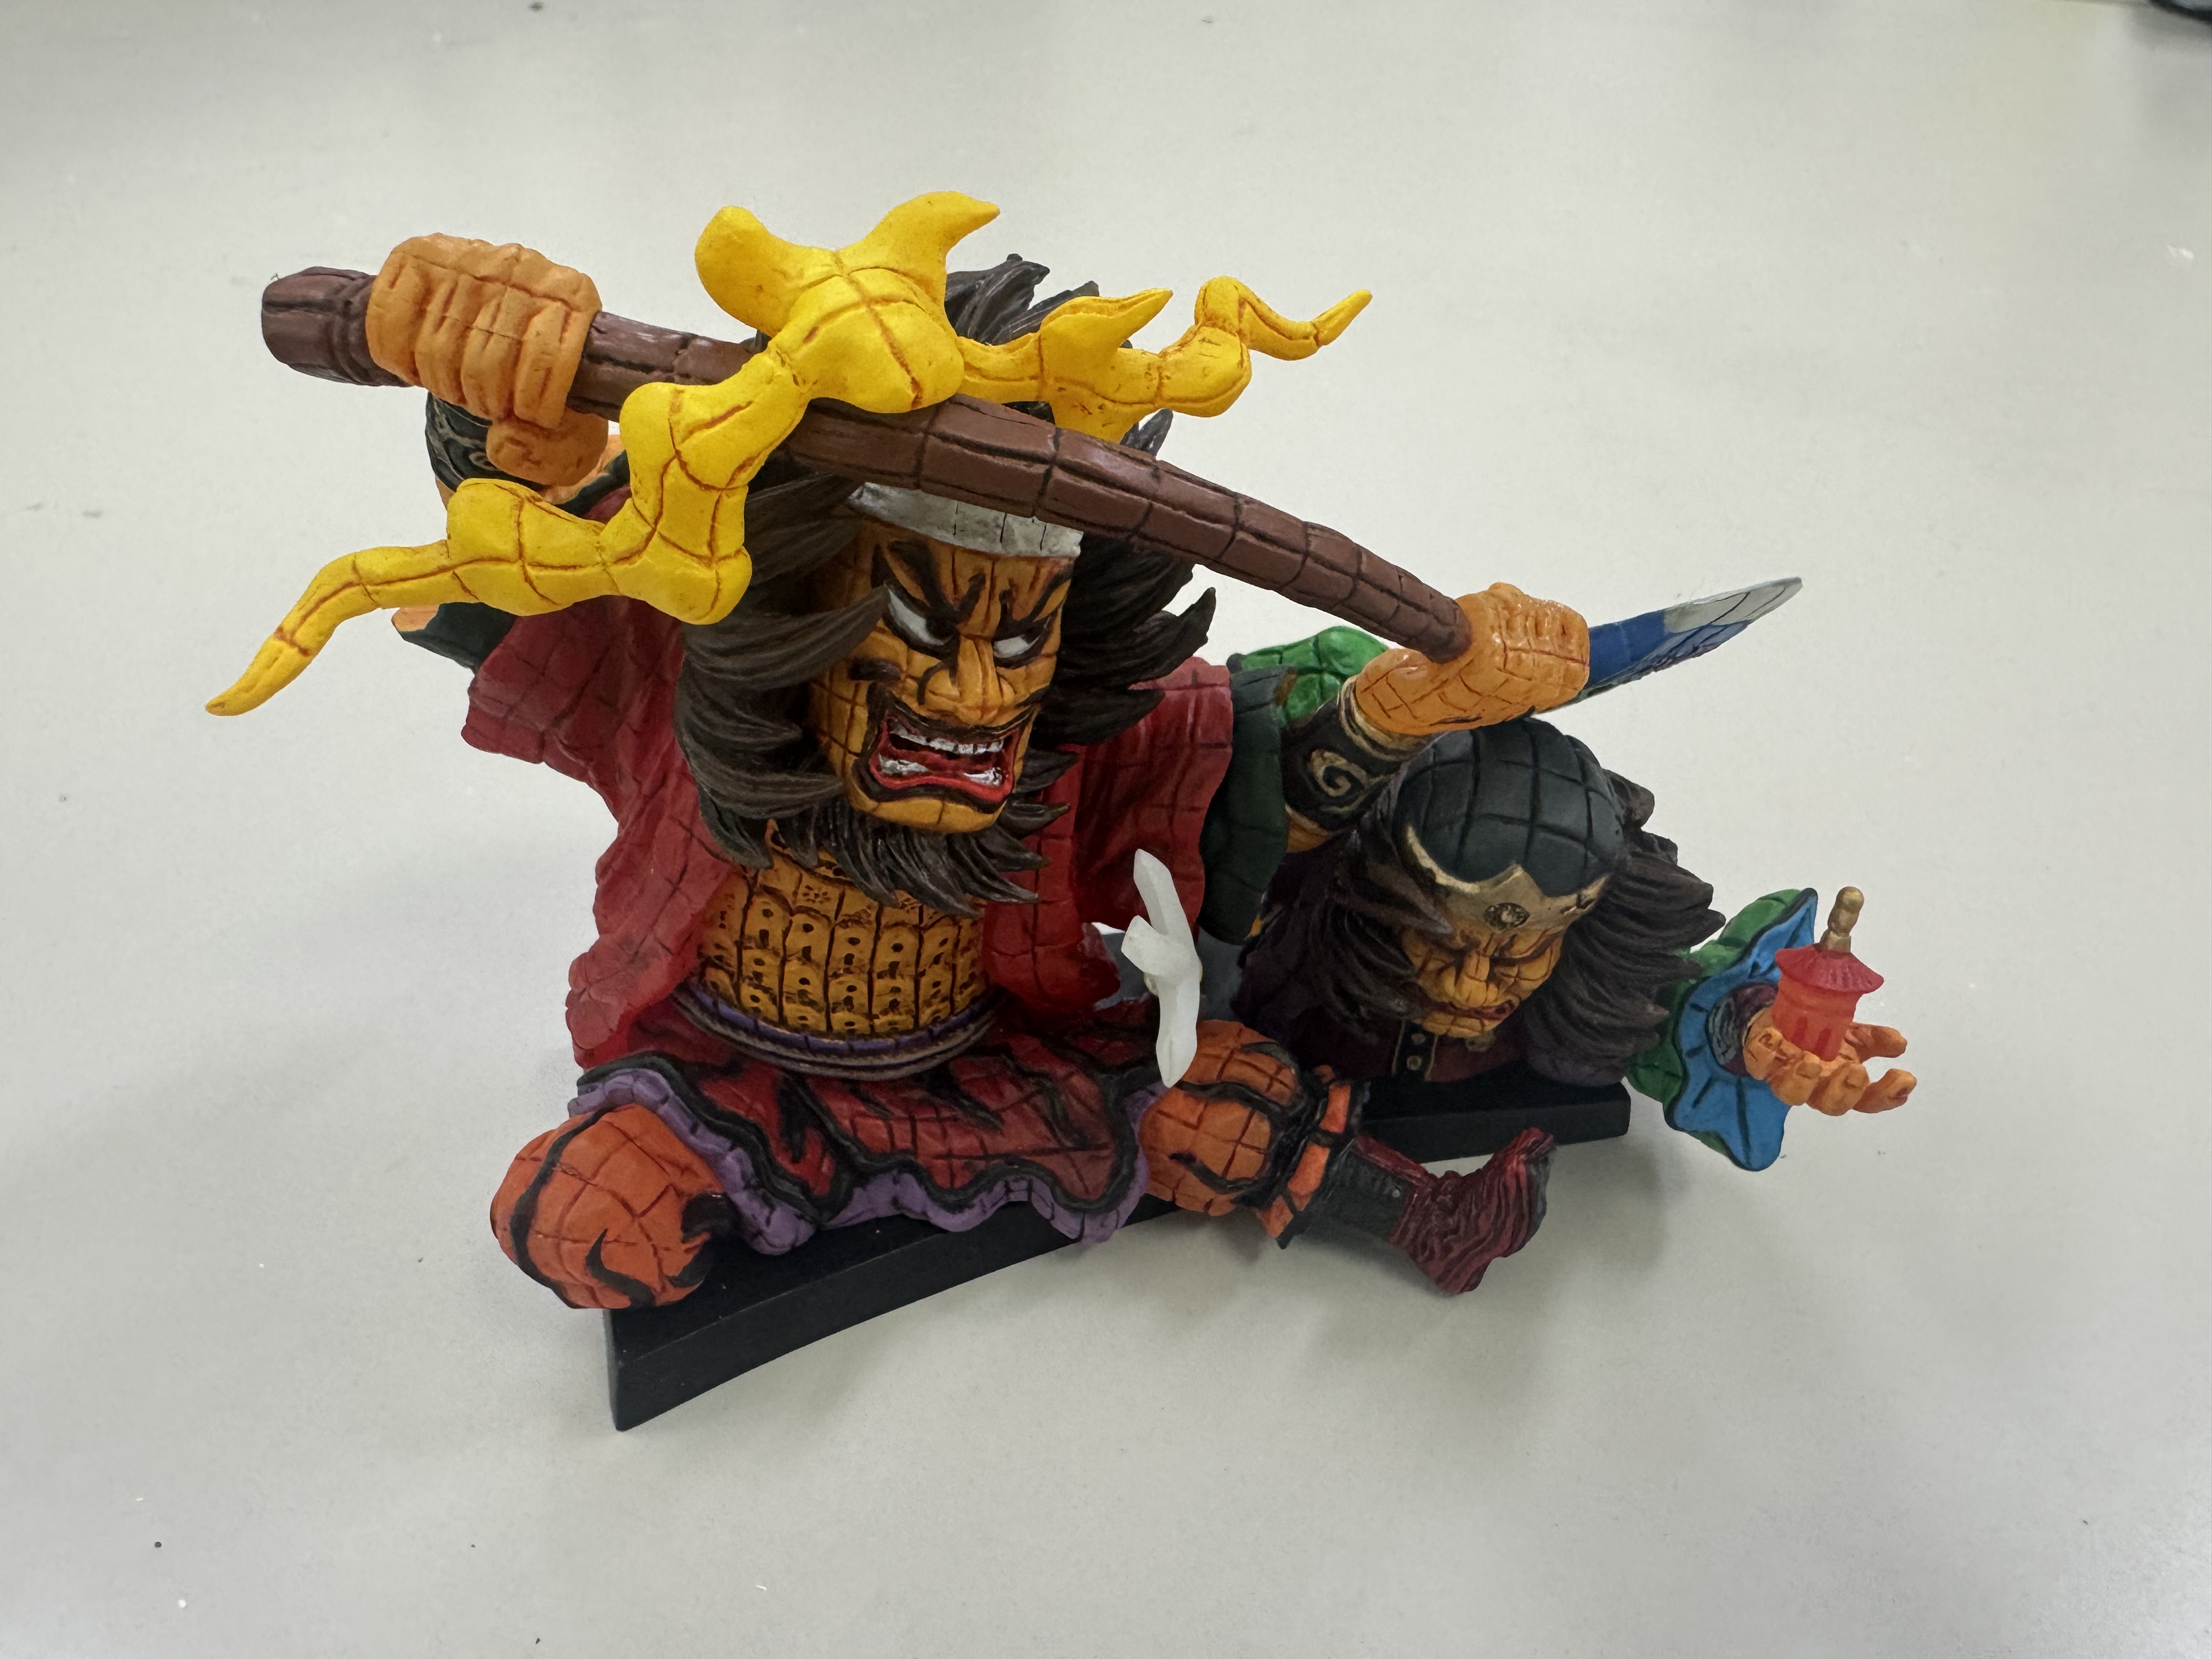
import cv2

# 画像を読み込む
image = cv2.imread('source.jpg')

# 長辺が800ピクセルになるようにアスペクト比を保ったままリサイズする
height, width = image.shape[:2]
if height > width:
  new_height = 800
  new_width = int(width * (800 / height))
else:
  new_width = 800
  new_height = int(height * (800 / width))
resized_image = cv2.resize(image, (new_width, new_height))

# 画像を保存する
cv2.imwrite('1.png', resized_image)
1

import cv2

# 画像を読み込む
image = cv2.imread('1.png')

# 移動平均フィルタで平滑化する
blured = cv2.blur(image, (7, 7))

# ぼかした画像との差分を使って鮮鋭化する
sharpen = cv2.addWeighted(image, 2.0, blured, -1.0, 0)

# 結果を保存する
cv2.imwrite('2.png', sharpen)
2

import cv2
import numpy as np

# 画像を読み込む
image = cv2.imread('1.png')

# RGBそれぞれ2段階になるように減色処理を行う
posterized = np.uint8(image / 128) * 255

# 画像を保存する
cv2.imwrite('3.png', posterized)
3

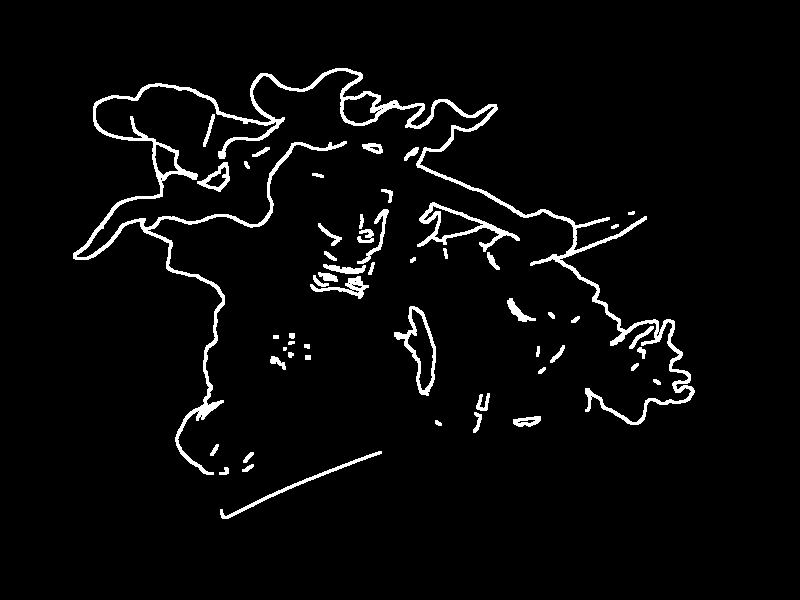
import cv2
import numpy as np

# 画像を読み込む
image = cv2.imread('1.png')

# Cannyエッジ検出
edges = cv2.Canny(image, 500, 600)

# 画像を保存する
cv2.imwrite('4_1.png', edges)

# edgesを膨張させる
kernel = np.ones((3,3),np.uint8)
thickened = cv2.dilate(edges, kernel, iterations = 1)

# 画像を保存する
cv2.imwrite('4_2.png', thickened)
4_1

4_2
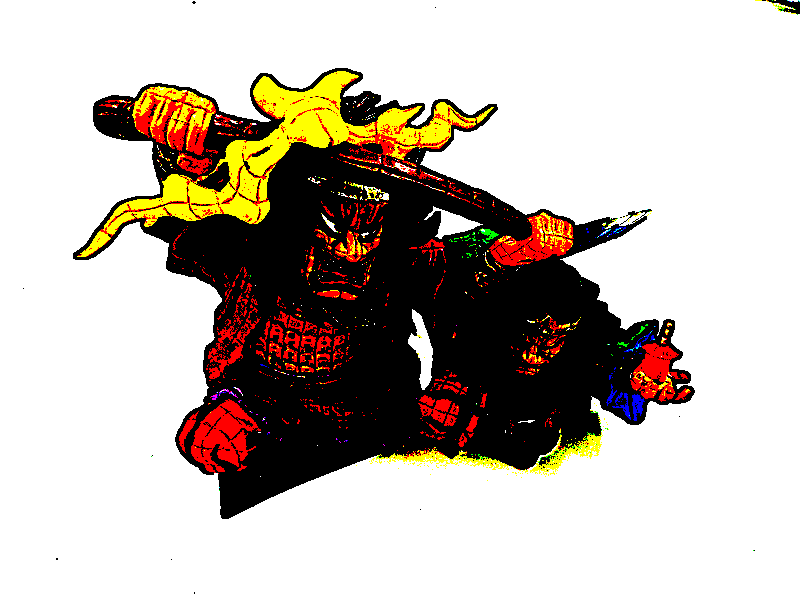
import cv2
import numpy as np

# 画像を読み込む
image = cv2.imread('3.png')
frame = cv2.imread('4_2.png')

# 白枠がついた画像を作る
framed_white = np.where(frame == 255, 255, image)
# 黒枠がついた画像を作る
framed_black = np.where(frame == 255, 0, image)

# 画像を保存する
cv2.imwrite('5_1.png', framed_white)
cv2.imwrite('5_2.png', framed_black)
5_1

5_2